14 min to read
cPGuard Update Hijack: What Hosting Teams Must Do Now
A fake security update ran as root on about 2,950 Linux servers. Patching is step one; rotating every root secret is the real fix.
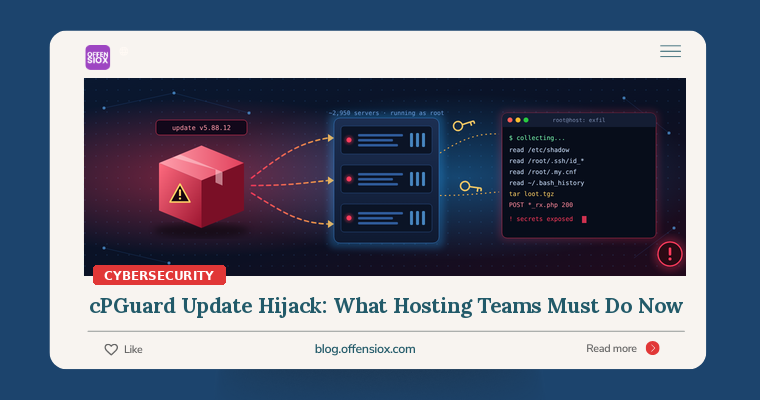
Security software runs with the highest privileges on a server, and it updates itself automatically. That is exactly what makes it useful, and exactly what made it dangerous this week. On 2 November 2026, an attacker pushed a fake update through the official update channel of cPGuard, a server security suite made by OPSSHIELD and widely used on cPanel, Plesk and DirectAdmin hosting servers. Servers that installed it ran a script as root that collected password hashes, SSH keys and database credentials and sent them off.
OPSSHIELD told BleepingComputer that 2,946 servers were affected. Updating to the clean release removes the attacker’s files, but it does not un-steal anything. If one of your servers is on that list, every root-level secret on it should now be treated as known to the attacker. This post explains what happened, how to check whether you are affected, and the order in which to clean up.
TL;DR / Key takeaways
- What: An attacker broke into OPSSHIELD’s billing and licensing server, stole the key used to publish cPGuard updates, and shipped a malicious “update” that ran as root on customer servers.
- Who: Servers that installed cPGuard 5.88.12 through 5.88.19. The vendor says any server that was online with cPGuard between 02:08 and 03:20 UTC on 2 November should assume its root secrets are exposed. About 2,950 servers ran the script.
- What was taken:
/etc/shadowand/etc/passwd, everything in/root/.ssh,/root/.my.cnf, root shell history and, on a few servers,/root/.s3cfg. About 7,900 billing-portal account records were also copied.- Do first: Update to cPGuard 5.88.25 or later, then check your update log. If an affected version ever installed, reset root and local passwords, replace SSH keys, and rotate every database, cloud and API secret on the box.
- Then hunt: Look for the published IOCs (
/var/tmp/.cpg91511_sh,/etc/cron.d/i93677and others) and for unknown keys inauthorized_keys.
Timeline
The vendor published two notices on 3 November: a customer advisory and a longer incident disclosure with a detailed timeline. The times below come from the disclosure (UTC).
| When (UTC) | What happened |
|---|---|
| 1 Nov, 15:38 | Attacker starts probing manage.opsshield.com, the vendor’s billing portal. |
| 1 Nov, 16:34 | Attacker registers a customer account under a false identity and orders a free cPGuard trial. |
| 1 Nov, 21:17 | Attacker installs the trial on their own server. cPGuard flags and bans them twice between 21:40 and 21:51. |
| 1 Nov, 22:58 | After crafted requests to billing-portal callback pages, the attacker can run commands on the billing and licensing server. |
| 2 Nov, 02:04–02:09 | Fake update uploaded to the update storage using a stolen access key. |
| 2 Nov, 02:08–03:20 | cPGuard agents install the fake update, which runs as root and sends files back. |
| 2 Nov, 02:13 | Attacker copies three OPSSHIELD cloud servers. |
| 2 Nov | Stolen update key revoked; clean update published. |
| 3 Nov | Entry point traced; full disclosure published. Press coverage follows. |
Details are still settling, and the vendor’s own documents differ in places:
- Entry point. The first advisory said the attacker “used compromised credentials to gain unauthorized access to OPSSHIELD’s update distribution infrastructure (CDN)”. The later disclosure says the attacker “signed up as a customer, used that account to break into our billing and licensing server, took the keys we use to publish updates”. The disclosure is newer and more detailed.
- Duration. The advisory and press reports describe roughly 12 hours before detection. The disclosure says the fake update ran “for about 70 minutes”.
- Fixed version. All remediation guidance says 5.88.25 or later. The disclosure also mentions a clean 5.88.26 release that removes the attacker’s tools. Install whatever is newest.
How the attack worked
This was not a vulnerability in cPGuard running on your server. It was a compromise of the vendor, then abuse of the trust every customer server places in the vendor’s updates.
1. Getting in through the side door. The attacker became a customer. With a trial account on the billing application, they found a way to run commands on the billing and licensing server. OPSSHIELD says its logs do not record the exact request that gave them that access.
2. Stealing the publishing key. That server held the key used to upload cPGuard updates. Once the attacker had it, they could put any file they liked in the update storage, and customer servers would treat it as genuine.
3. Shipping the “update”. The vendor describes the payload plainly: “The fake update was a short script, not a long-term implant: it collected sensitive files and sent them to a server the attacker controlled.” Because cPGuard updates run as root, the script could read anything:
/etc/shadowand/etc/passwd(password hashes for root and every local account)/root/.ssh: private keys,authorized_keysandknown_hosts/root/.my.cnfwhere present (often the MySQL root password on hosting servers)- root’s shell history (which frequently contains passwords and tokens typed on the command line)
/root/.s3cfgon a small number of servers (S3 access keys)
4. Leaving a way back in. Despite being described as a collector, the script also left a hidden setuid-root shell at /var/tmp/.cpg91511_sh, files in /var/tmp/.i93677/, and a scheduled task at /etc/cron.d/i93677.
5. Taking the customer list too. The disclosure says the attacker “reached our billing system and took a copy of client account records”: about 7,900 billing-portal accounts with name, company, postal address, email and a bcrypt-hashed password. The vendor also found an older, separate backdoor on one of its own internal servers.
Why this is worse than it looks
Look at what was collected. SSH private keys from /root/.ssh are often trusted by other machines: backup servers, other nodes in a cluster, Git servers, monitoring hosts. Root shell history is a well-known hiding place for database passwords and API tokens. The known_hosts file is a ready-made map of where those keys might work. On a shared hosting server, /root/.my.cnf can unlock the MySQL instance that holds every customer website’s database.
So the blast radius is not just the 2,950 servers. It is everything those servers’ secrets can reach.
Am I affected?
You are potentially affected if any of these are true:
- A server had cPGuard installed and online between 02:08 and 03:20 UTC on 2 November 2026 (07:08–08:20 PKT).
- The cPGuard update log shows that any version from 5.88.12 to 5.88.19 was ever installed.
- OPSSHIELD contacted you about the incident, or its incident lookup page (linked in the disclosure) flags your server.
- You have an account on the
manage.opsshield.combilling portal (your contact details and password hash were copied).
Check the update history with the command the vendor published:
~|#| Any "Successfully updated to 5.88.12" ... "5.88.19" line means the
~|#| server installed an affected build, even if it now runs a clean version.
grep 'Successfully updated' /opt/cpguard/logs/install_log

~|#| Confirm the running version is 5.88.25 or later
cpgcli ~|-|~|-|version
Two caveats from the vendor matter here. A missing or incomplete log does not prove you are safe: the script may still have run. And the update cleans up the known files, so “the files aren’t there” does not prove the script never ran. If you are unsure, treat the server as affected.
Published indicators of compromise
These come directly from OPSSHIELD’s advisory and incident disclosure. Do not rely on them alone; the vendor itself says their absence is not proof of a clean server.
Files and paths on customer servers
/var/tmp/.cpg91511_sh            ~|#| setuid~|-|root shell left by the fake update
/var/tmp/.cpg91511/              ~|#| collection directory
/var/tmp/.cpg91511/loot.tgz      ~|#| staged archive of stolen files
/var/tmp/.i93677/
/etc/cron.d/i93677               ~|#| persistence
cpguard~|-|v58812~|-|i91511*.sh        ~|#| malicious script (four variants)
SHA-256 hashes of the malicious script variants
2c2acd988da531d133d0e17f245c49bf15781278f837543d18c95e8410eabd38  cpguard~|-|v58812~|-|i91511.sh
ffd7a47f65fa1244429baa936ae94be54676b53d2f88bc39564f24e22011de8a  cpguard~|-|v58812~|-|i91511b.sh
d73919af84bf46de941db85e27fd1abc65701ef9ce6cf33bb27c5397f4a41c26  cpguard~|-|v58812~|-|i91511c.sh
6add0201e9a3d02de772d561d05e0da86eb1c538686753b7adcc3aedf7366f77  cpguard~|-|v58812~|-|i91511d.sh
Network indicators
94.183.188.91    ~|#| main operator; sometimes used a fake "cPGuard/5.88.11" user agent
5.182.208.167    ~|#| used during reconnaissance
5.182.208.206    ~|#| server.zencorehost.com, attacker test server with a cPGuard trial
*_rx.php         ~|#| URL path used to receive stolen data
A quick, read-only triage script you can run as root on each server:
~|#|!/usr/bin/env bash
~|#| cPGuard incident triage (read~|-|only). Review output manually.
echo "~|=|~|=| cPGuard version / update history ~|=|~|=|"
cpgcli ~|-|~|-|version 2>/dev/null
grep 'Successfully updated' /opt/cpguard/logs/install_log 2>/dev/null \
  | grep ~|-|E '5\.88\.1[2~|-|9]' || echo "no 5.88.12~|-|5.88.19 entries found (not proof of safety)"

echo "~|=|~|=| Known IOC paths ~|=|~|=|"
for p in /var/tmp/.cpg91511_sh /var/tmp/.cpg91511 /var/tmp/.i93677 /etc/cron.d/i93677; do
  [ ~|-|e "$p" ] && echo "PRESENT: $p"
done

echo "~|=|~|=| Setuid files in /var/tmp and /tmp ~|=|~|=|"
find /var/tmp /tmp ~|-|xdev ~|-|perm ~|-|4000 ~|-|type f ~|-|ls 2>/dev/null

echo "~|=|~|=| Hidden directories in /var/tmp ~|=|~|=|"
find /var/tmp ~|-|maxdepth 1 ~|-|name '.*' ! ~|-|name '.' ~|-|ls 2>/dev/null

echo "~|=|~|=| Root authorized_keys (verify every line) ~|=|~|=|"
cat /root/.ssh/authorized_keys 2>/dev/null

echo "~|=|~|=| Logins from published IPs ~|=|~|=|"
grep ~|-|hE '94\.183\.188\.91|5\.182\.208\.(167|206)' /var/log/secure* /var/log/auth.log* 2>/dev/null | tail ~|-|n 50
For fleets, push the same checks through your configuration-management tool and look for outbound connections to the three IPs in firewall, NetFlow or proxy logs from 1 November onward. If you run a SIEM, a simple search on the IPs plus any process execution from /var/tmp/. paths is a good starting point. For example, with auditd data in Splunk:
index~|=|linux (sourcetype~|=|linux_audit OR sourcetype~|=|auditd)
  (exe~|=|"/var/tmp/.*" OR name~|=|"/var/tmp/.cpg91511*" OR name~|=|"/etc/cron.d/i93677")
| stats earliest(_time) as first latest(_time) as last count by host, exe, name
What to do: a prioritised checklist
Immediately (today)
- Update cPGuard everywhere:
cpgcli update --start, then confirmcpgcli --versionshows 5.88.25 or later. The vendor says this release “includes the corrective update to remove the known backdoor and the files staged by the script”. - Run the update-history check on every server and build a list of affected hosts. When in doubt, include the host.
- Reset passwords for root and every password-enabled local account on affected servers. The vendor recommends doing this from a trusted recovery environment.
- Replace SSH keys. Generate new key pairs for root, and remove the old public keys from every system that trusted them: other servers, backup targets, Git hosts, cloud consoles. Then audit each server’s
authorized_keysfor entries you don’t recognise. - Rotate MySQL/MariaDB root credentials (anything in
/root/.my.cnf), S3 keys from/root/.s3cfg, DigitalOcean or other cloud tokens, and any secret that appears in root’s shell history. - Block the published IPs at the edge and check logs for any past connections to them.
This week
- Hunt beyond the known IOCs. Look for new setuid binaries, new cron jobs and systemd units, unexpected accounts in
/etc/passwd, and recent changes tosshd_config. Compare against a known-good baseline if you have one. - Follow the keys outward. For every host whose root key was trusted by an affected server, review its SSH logs since 1 November for logins you can’t explain.
- Decide on rebuild vs. clean-up. OPSSHIELD says it is “not recommending a full server reset or operating-system rebuild as a routine response”. It does say that if it told you the attacker logged in to your server by hand, you should rebuild from a clean backup taken before 1 November. Our view: for servers holding sensitive customer data, or where you find anything beyond the documented IOCs, rebuild.
- Billing-portal users: reset your
manage.opsshield.compassword, enable two-factor authentication, and expect targeted phishing that uses your real name, company and address. - Tell your customers what they need to know. If you are a hosting provider, decide whether customer site or database credentials could have been exposed through the server’s root access and plan notification accordingly.
- Watch for the vendor’s follow-up updates, including removal of OPSSHIELD support-access keys from servers where they were added and reissued licence keys.
Longer term
- Treat agents with auto-update as privileged supply chain. Inventory every tool on your servers that updates itself as root (security agents, control-panel plugins, monitoring). For each one, ask: can I stage updates, delay them or pin versions on critical hosts?
- Get secrets off root’s disk. Avoid storing database passwords in
/root/.my.cnfwhere you can, use a secrets manager or short-lived credentials, and stop secrets landing in shell history (HISTCONTROL=ignorespace, or passing secrets through files with tight permissions). - Stop reusing root keys across hosts. Use per-host keys, SSH certificates with short lifetimes, or a bastion with central access control, so one stolen key doesn’t open the whole fleet.
- Restrict egress. Hosting servers rarely need to send data to arbitrary internet hosts. Outbound allow-lists would make a collection script like this one far noisier, if not ineffective.
- Include vendor compromise in your incident-response plan, with a pre-agreed list of secrets to rotate and an owner for each.
OffensioX perspective
This incident follows a pattern we keep seeing: attackers go after the tools defenders trust, because those tools already have root and already have a delivery channel. A software vendor’s billing portal is not usually thought of as critical infrastructure, yet here it led to the update-publishing key and from there to thousands of servers. The lesson for vendors is obvious: signing and publishing keys must never sit on an internet-facing business system. The lesson for everyone else is less comfortable: you inherit your vendors’ weakest system. In Pakistan and across South Asia, a large share of business websites and online stores run on shared cPanel or Plesk hosting, often managed by small teams who install a security suite precisely because they cannot watch servers around the clock. Those businesses won’t see this incident themselves. Their host will need to rotate the secrets for them. If you run hosting or manage your own servers, the most useful thing you can do this week is list every root-level secret you hold and prove you could rotate all of them in a day.
OffensioX helps businesses test exactly these trust paths through penetration testing and security assessments of servers, hosting environments and the third-party tools that run on them. If you want a second pair of eyes on your exposure, get in touch.
References
- OPSSHIELD: cPGuard update channel compromise (customer advisory, 3 Nov 2026)
- OPSSHIELD: Security incident disclosure, timeline and IOCs (3 Nov 2026)
- OPSSHIELD: Server incident lookup
- BleepingComputer: Hackers hijack cPGuard autoupdate to deploy backdoor, steal data
- The Hacker News: cPGuard Update Channel Hijacked to Backdoor Linux Servers and Collect Password Hashes
- InfraStack: cPGuard breach analyst entry (CMP-202611-nvoxcm)
- Aviatrix Threat Research Center: cPGuard autoupdate hijack